Priority Matrix was built for collaboration. Here we’ll explain how to add and remove team members, reassign their data, add them to projects, assign/delegate tasks to them, and make them follow specific items so they get timely notifications.
Step One: Adding People to Your Team
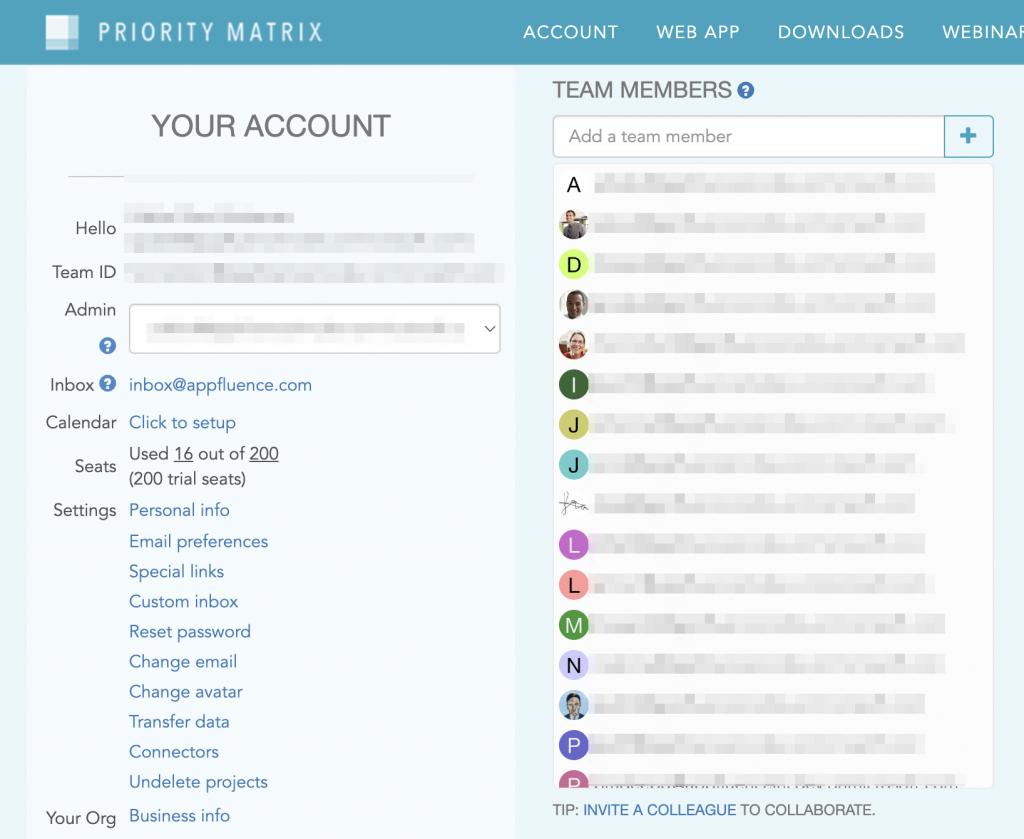
To use Priority Matrix with your team, you first need to add your team members to your account. You must be the account administrator to do this, and here’s what to do:
- Find your avatar near the top of the PM window, and click on it
- In the menu that comes up, select “manage account”
- A screen will appear where you can add team members by adding their email.

Note that you should add enough seats to your account to accommodate for all users.
Step Two: Invite Your Team Members to a Project
Now that you’ve added some team members, you can share your projects with them. By default, all of your projects are private and personal (only you can see them). You can make a project editable by one or more team members by doing the following:
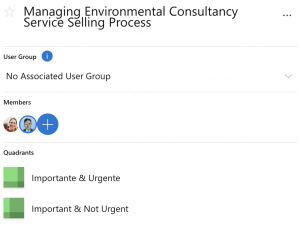
- Using the project list, click or tap on the desired project
- In the panel that shows up, locate the “Members” section, and click on the (+) button

- Add users by email, or by locating them in your list of collaborators
Deleting Users and Reassigning Data
If you need to delete a user from your account, enterprise users have a self-serve solution to reassign data and delete the account of past employees. However, for small subscriptions, we can assist. Just send us a message explaining the user(s) you want to delete, and whether you’d like their data reassigned to someone else.
Collaboration Features
Ok! So, your team is all set up, your projects are shared, and you’re ready to collaborate. Let’s take a look at the different things you can do.
Task Delegation
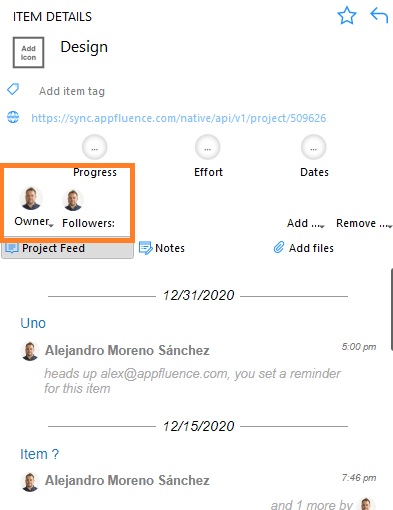
Once a project is shared, your team can delegate tasks to each other. The person who the task is delegated to becomes the new “task owner” but you will remain as a “task follower”. There are several ways to delegate a task:
- Click on the avatar of each task and select someone from the list that appears
- When the “Details Panel” is open (where you set due dates, write notes, etc.), click on the avatar for the owner, and select someone from the dropdown.
- Use the chat commands: In the item chat, type “assign to tony” (or someone else in your team)
Task Followers
So, now you can assign a task! But, what if you want to stay in the loop, or you want a team member to stay in the loop, but the task is delegated to someone else? That’s where “followers” come into play. If someone in the project doesn’t own the task but wants to keep tabs on it, that person can either be added or add him or herself as a “follower.” Followers get email updates and push notifications when changes are made to the item.
Note that you can make yourself the owner (or follower) of any item. Use this to your advantage, to keep tabs on anything important, and mute the rest.
Item Chat
In the Item Details Panel, you’ll find the Chat Section. The Conversation Section not only lists the history of changes made to the item (such as added files, updated due dates, changes of owners), but also provides a place where your team can converse about the item. Just write up a comment, hold shift and push enter, and you’ve started the conversation. The most successful PM teams use this feature as an alternative to email, leaving the email inbox for external communications only. Even better, the conversation section will never be deleted, leaving you an entire history of your changes and conversations even after the item has been complete.

