Sometimes it's necessary to interchange data from and to Priority Matrix. To enable that, we support exporting and importing CSV files. The CSV format is understood by multitude of applications, including your favorite spreadsheet applications, such as Microsoft Excel or Google Sheets.
How to export a Priority Matrix project into a CSV file
The steps to export a matrix into an easily shareable CSV file are as follows:
- Open your list of projects
- Select (double click) the desired project
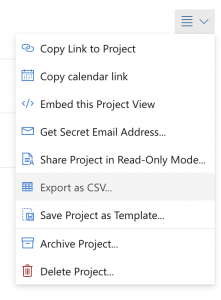
- On the top-right menu, choose "Export as CSV..."
This step is useful, among other things, to understand the format that Priority Matrix expects when importing data, in the next steps.
How to create a new Priority Matrix project from a CSV file
The steps to create a new Priority Matrix project from a CSV file are simple, too. First, you need to make sure that the CSV file you have contains at least one column titled "name", and any other fields that you want to utilize should be compatible with the format exported in the previous section. Otherwise, your imported project might not use the values you expect. The easiest way to do this is to export a project into a CSV file, and then take a look at its contents.
- Open the Priority Matrix web app
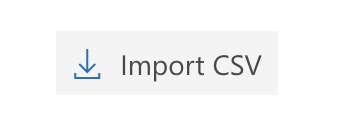
- Click the "+ project" button

- Select "Import CSV"
- Pick the file that you'd like to import, and see that a new Priority Matrix project is created

How to load a CSV file with items into an existing PM project
The previous section describes how to create a
new project from the contents of a CSV file. But if your intention is to load the file into an existing project, follow these steps instead:
- Open the project where you'd like to load your CSV file
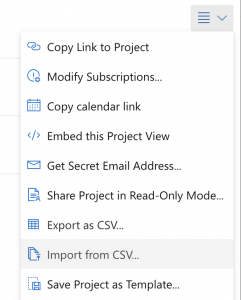
- From the top-right "project details" menu, choose "Import from CSV..."
- Choose the CSV file and click to open it
- After a few moments, the app will start showing you the created items
You can open the project's feed view to review what happened.
Meaning of the CSV headers
When exporting a Priority Matrix project as CSV, the result is effectively a table with named headers. The first row is a list of field names, or column headers. Every subsequent row represents an item or task. The meaning of these headers is often easy to guess, but some fields require additional explanation. Here is a complete list:
- name: The title of the task or item
- state: 0 if the item is open, 1 if it's complete, and 2 or 3 if deleted (rare)
- icon: The name of the icon shown along this item.
- index: A numerical value that indicates the relative order of items when shown in manual mode. Higher numbers are shown toward the top.
- macResourceURL: The URL or link that's pointed to by the item. It can be any valid web URL.
- quadrant: 0, 1, 2 or 3 representing top-left, top-right, bottom-left and bottom-right.
- descriptionText: The notes for the item.
- creationDate: When the item was created.
- dueDate: When the item is due.
- startDate: When the item is supposed to start (if this value is present, then the dueDate is mandatory).
- untilDate: If the item is recurrent, this date is the last time of the recurrence.
- allDay: True/False, indicating whether the due/start date are full-day, instead of date and time.
- completionDate: When the item was completed, if at all.
- completionPercentage: Number from 0 to 100 indicating how complete this item or task is.
- owner: The email address (or username) of the person in charge of this item or task.
- frequency: Not used.
- recurrence: Value that indicates if the item is recurrent, and how it re-spawns when completed (daily, weekly...)
- effort: An approximate measure of how long it would take to complete this task (the value is numeric but it means something different, as shown in the app: 1h, 2h, half a day...)
- estimatedEffort: The estimated amount of effort that it would take to complete this item, measured in minutes. This value goes in sync with 'effort'.
- realizedEffort: The actual amount of effort that it would take to complete this item, measured in minutes. The user is supposed to provide this value, but support is partial.
- timestamp: The last time there was a material modification to the item, including the addition of new comments.
- item_tags: The list of tags associated with the item.
- textFirstQuadrant: The title of the 1st quadrant in the project that contains the item. Fields from here on would be the same for all items in the same project, and therefore might be redundant.
- textSecondQuadrant: The title of the 2nd quadrant in the project that contains the item.
- textThirdQuadrant: The title of the 3rd quadrant in the project that contains the item.
- textFourthQuadrant: The title of the 4th quadrant in the project that contains the item.
- colorFirstQuadrant: The color of the 1st quadrant in the project that contains the item.
- colorSecondQuadrant: The color of the 2nd quadrant in the project that contains the item.
- colorThirdQuadrant: The color of the 3rd quadrant in the project that contains the item.
- colorFourthQuadrant: The color of the 4th quadrant in the project that contains the item.
- notes: The notes for the item's project.
- project_name: The project that contains this item, or empty if it's in the inbox.
- project_tags: The list of tags associated with the item's project.
Sometimes fields might be added over time, and it's ok to import a CSV project that doesn't contain all fields, as long as the `name` is present.
Exporting an entire account
Note that, if your goal is to export your entire Priority Matrix account instead of just a single project, it's possible to do so as well. Follow these
instructions to export your PM account all at once, which is sometimes needed for multiple reasons.
Note on date formats
In the .csv files used by Priority Matrix, dates are indicated in what's known as "Unix time" or "epoch time". In short, it's a number that counts the seconds since January 1, 1970. If you have dates in any other format, see
how to convert from and to epoch time.