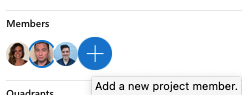
In Priority Matrix, your data is organized as a series of projects. Each project is a matrix, and a matrix contains 4 quadrants full of items. Additionally, multiple people can access a given project. Those people are called
project members. A project member has access to every item in that quadrant. If you don't want to give someone full access to an entire project, you can still
work with them as external collaborators.
By the way,
this article is NOT about Priority Matrix licenses; It's only about data access for already licensed users.
In this article, we'll explain how to add and remove project members using
Priority Matrix for web. Instructions for other versions of the app are similar, so follow along.
Who Can Add Project Members?
Anyone who is already in a project can add others to that project. The reason for this is that we don't want to create artificial access barriers to a given project. If you need to be able to restrict access to a project in a more limited way, you can, for example,
share the project in read-only mode, and that way you don't give control to anyone.
Who Can Remove Project Members?
When it comes to removing project members, there are two options. First, you can
remove yourself from a project. Anyone can do this with their own account, by simply deleting the project. In that case, if there are other project members, they will remain in the project, and only the user who requested the deletion will be removed.
Project Administrators
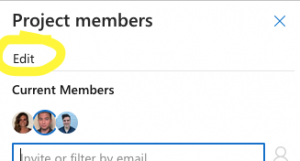
Second, you can remove others from a project, but with some constraints. The only users who can remove others from a project are the original creator of the project, and the administrators for a given project. Luckily, project administrators can easily make others administrators. To do this, start by
selecting the specific project, then in the project details panel, click on the list of members, and select the "edit" button
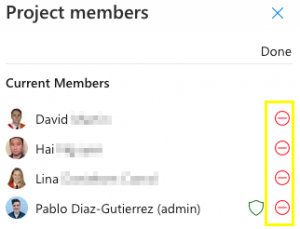
When you do that, you will see the list of current project members, along with a green shield that indicates the administrator status of those users. If you're an admin or project creator yourself, you will be able to turn on and off the admin status for other people.

How to Remove Project Members
At this point, you know who can remove project members. You also know how to make someone an administrator, so they can remove other members, so it's time to get to the point. In order to remove a project member, you need to open the list of project members as shown in the previous section, and then click "edit" to see the red buttons. Clicking the button next to each individual user will remove them from the project.
Those users will no longer have access to the project, and any contained items they own or follow will be unlinked as well.