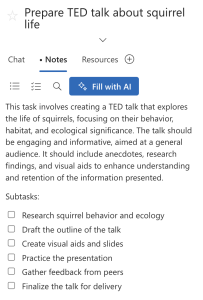
Sometimes, what starts as a simple task turns out to be more complex. When you find yourself adding multiple subtasks to an item, it might be time to convert it into a proper project.
Converting an item to a project helps you:
- Break down complex work into manageable pieces
- Visualize your task timeline more effectively
- Track progress with greater precision
- Keep your workspace organized and focused
Converting an Item in Three Easy Steps
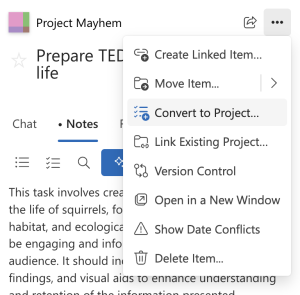
Step 1: Access the Conversion Option
Find the item you want to convert and choose one of these methods:
- Option A: Click the three dots menu (⋮) in the upper right corner when viewing the item details, and select “Convert to Project…”
- Option B: Right-click directly on the item in your main view and select “Convert to Project…” from the context menu
Step 2: Choose Your Conversion Method
You’ll see a dialog box with two options:
- Standard conversion: Converts your item and its existing subtasks directly
- AI-assisted conversion: Uses AI to analyze your task and potentially suggest improvements to your project structure
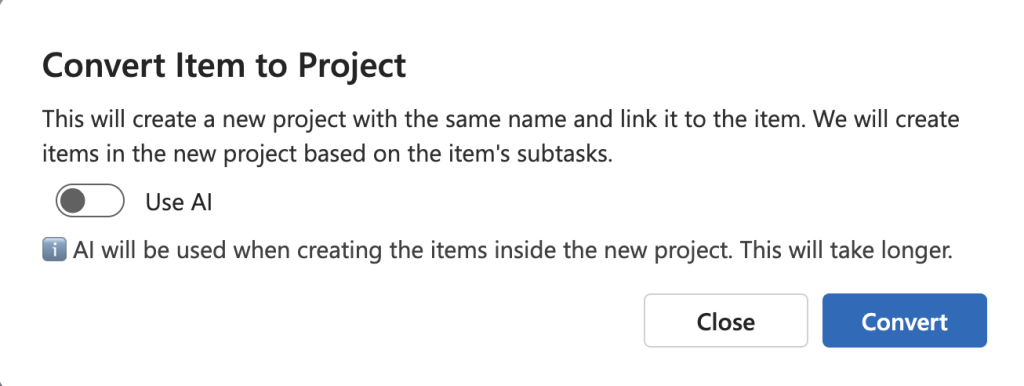
Pro Tip: AI-assisted conversion takes a bit longer but can identify tasks you might have overlooked. It’s especially useful for complex projects!
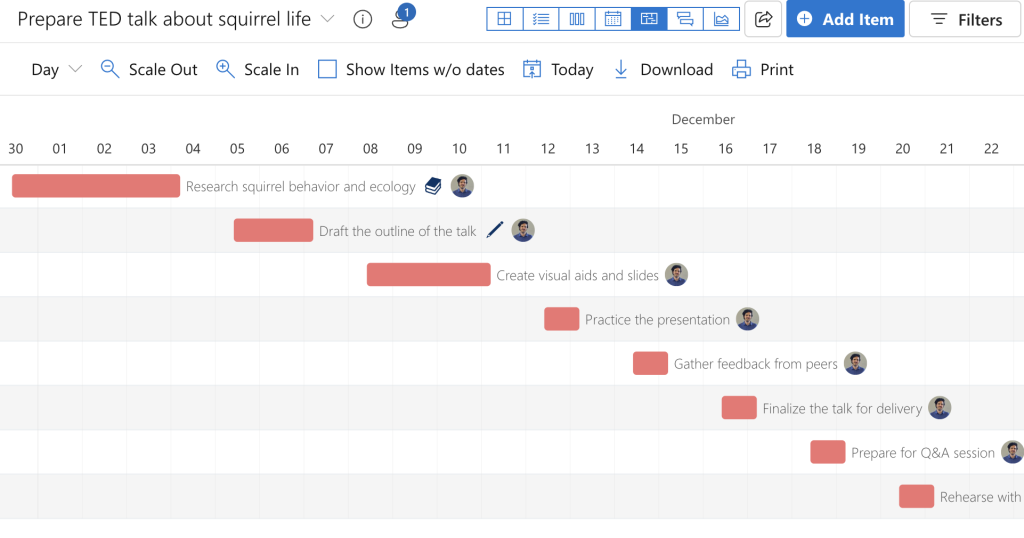
Step 3: Enjoy Your New Project View
After clicking “Convert,” your item transforms into a full project. Your subtasks are now individual items in the new project.
Working with Your New Project
Choose Your Preferred View
While we’ve shown the Timeline view above, your converted project can be displayed in several ways:
- Matrix view: The classic 4-quadrant Priority Matrix view
- Kanban view: Cards organized in columns by status
- List view: A simple list format for straightforward task management
- Timeline view: Tasks arranged chronologically (as shown above)
Pro Tip: Different team members can use different views of the same project based on their preferences!
Dashboard Projects and Linking
When you convert an item to a project, the original item becomes a link to your new project. This creates what we call a “dashboard” relationship:
- The original item serves as a gateway to the more detailed project
- Status updates in the project can reflect back on the dashboard item
- You can create multiple levels of projects and sub-projects
Learn more about creating powerful dashboards with this linking capability in our Dashboard View with Subprojects article.
Managing Your Project
Once conversion is complete, you can:
- Add new items directly to the project
- Change views to suit your current needs
- Track completion status for each task
- Print or download your project for meetings
- Navigate back to the original item through the project linkage
Common Questions
What happens to the original item?
The original item remains in its location but is now linked to your new project. This creates a dashboard-style relationship where the original item serves as an entry point to the more detailed project. Status changes in the project can reflect back on the dashboard item.
Can I convert an item without subtasks?
Yes! But you’ll get more value from conversion when your item already has subtasks defined.
Can I change the view of my converted project?
Absolutely! While we show the Timeline view in our example, you can switch to Matrix, Kanban, or List view at any time using the view selector buttons.
Can I undo a conversion?
While there’s no direct “undo” option, you can always delete the new project if you prefer to keep working with the original item structure.
Need More Help?
If you need additional assistance with Priority Matrix features, reach out to our support team through the app or visit our Help Center.