Microsoft Teams lets you pin your favorite, most frequently used apps for easy access. We recommend that you pin Priority Matrix so that your top priorities are always one click away. In this document, we explain how IT admins can pin Priority Matrix for every user in their tenant.
How to pin Priority Matrix for all Microsoft Teams users
If you are a Microsoft Teams administrator, you can save your team members a lot of time and effort by pinning the Priority Matrix add-in for them. That way, the PM icon will be readily available for them when they open Teams.
These are the instructions to pin the Priority Matrix add-in for all your Microsoft Teams users:
- In the Teams Admin Center, click "Teams Apps", and go to Setup policies
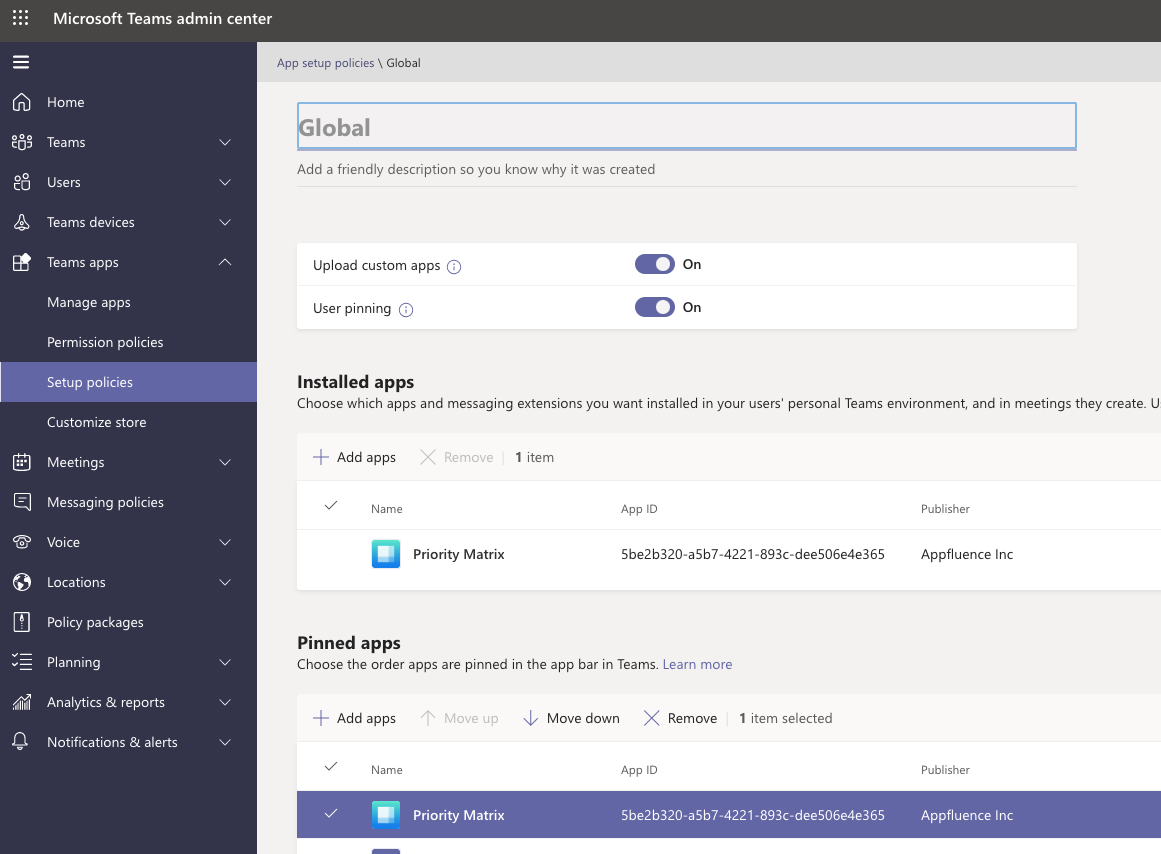
- You will see a list of policies. Click the "Global" policy link.
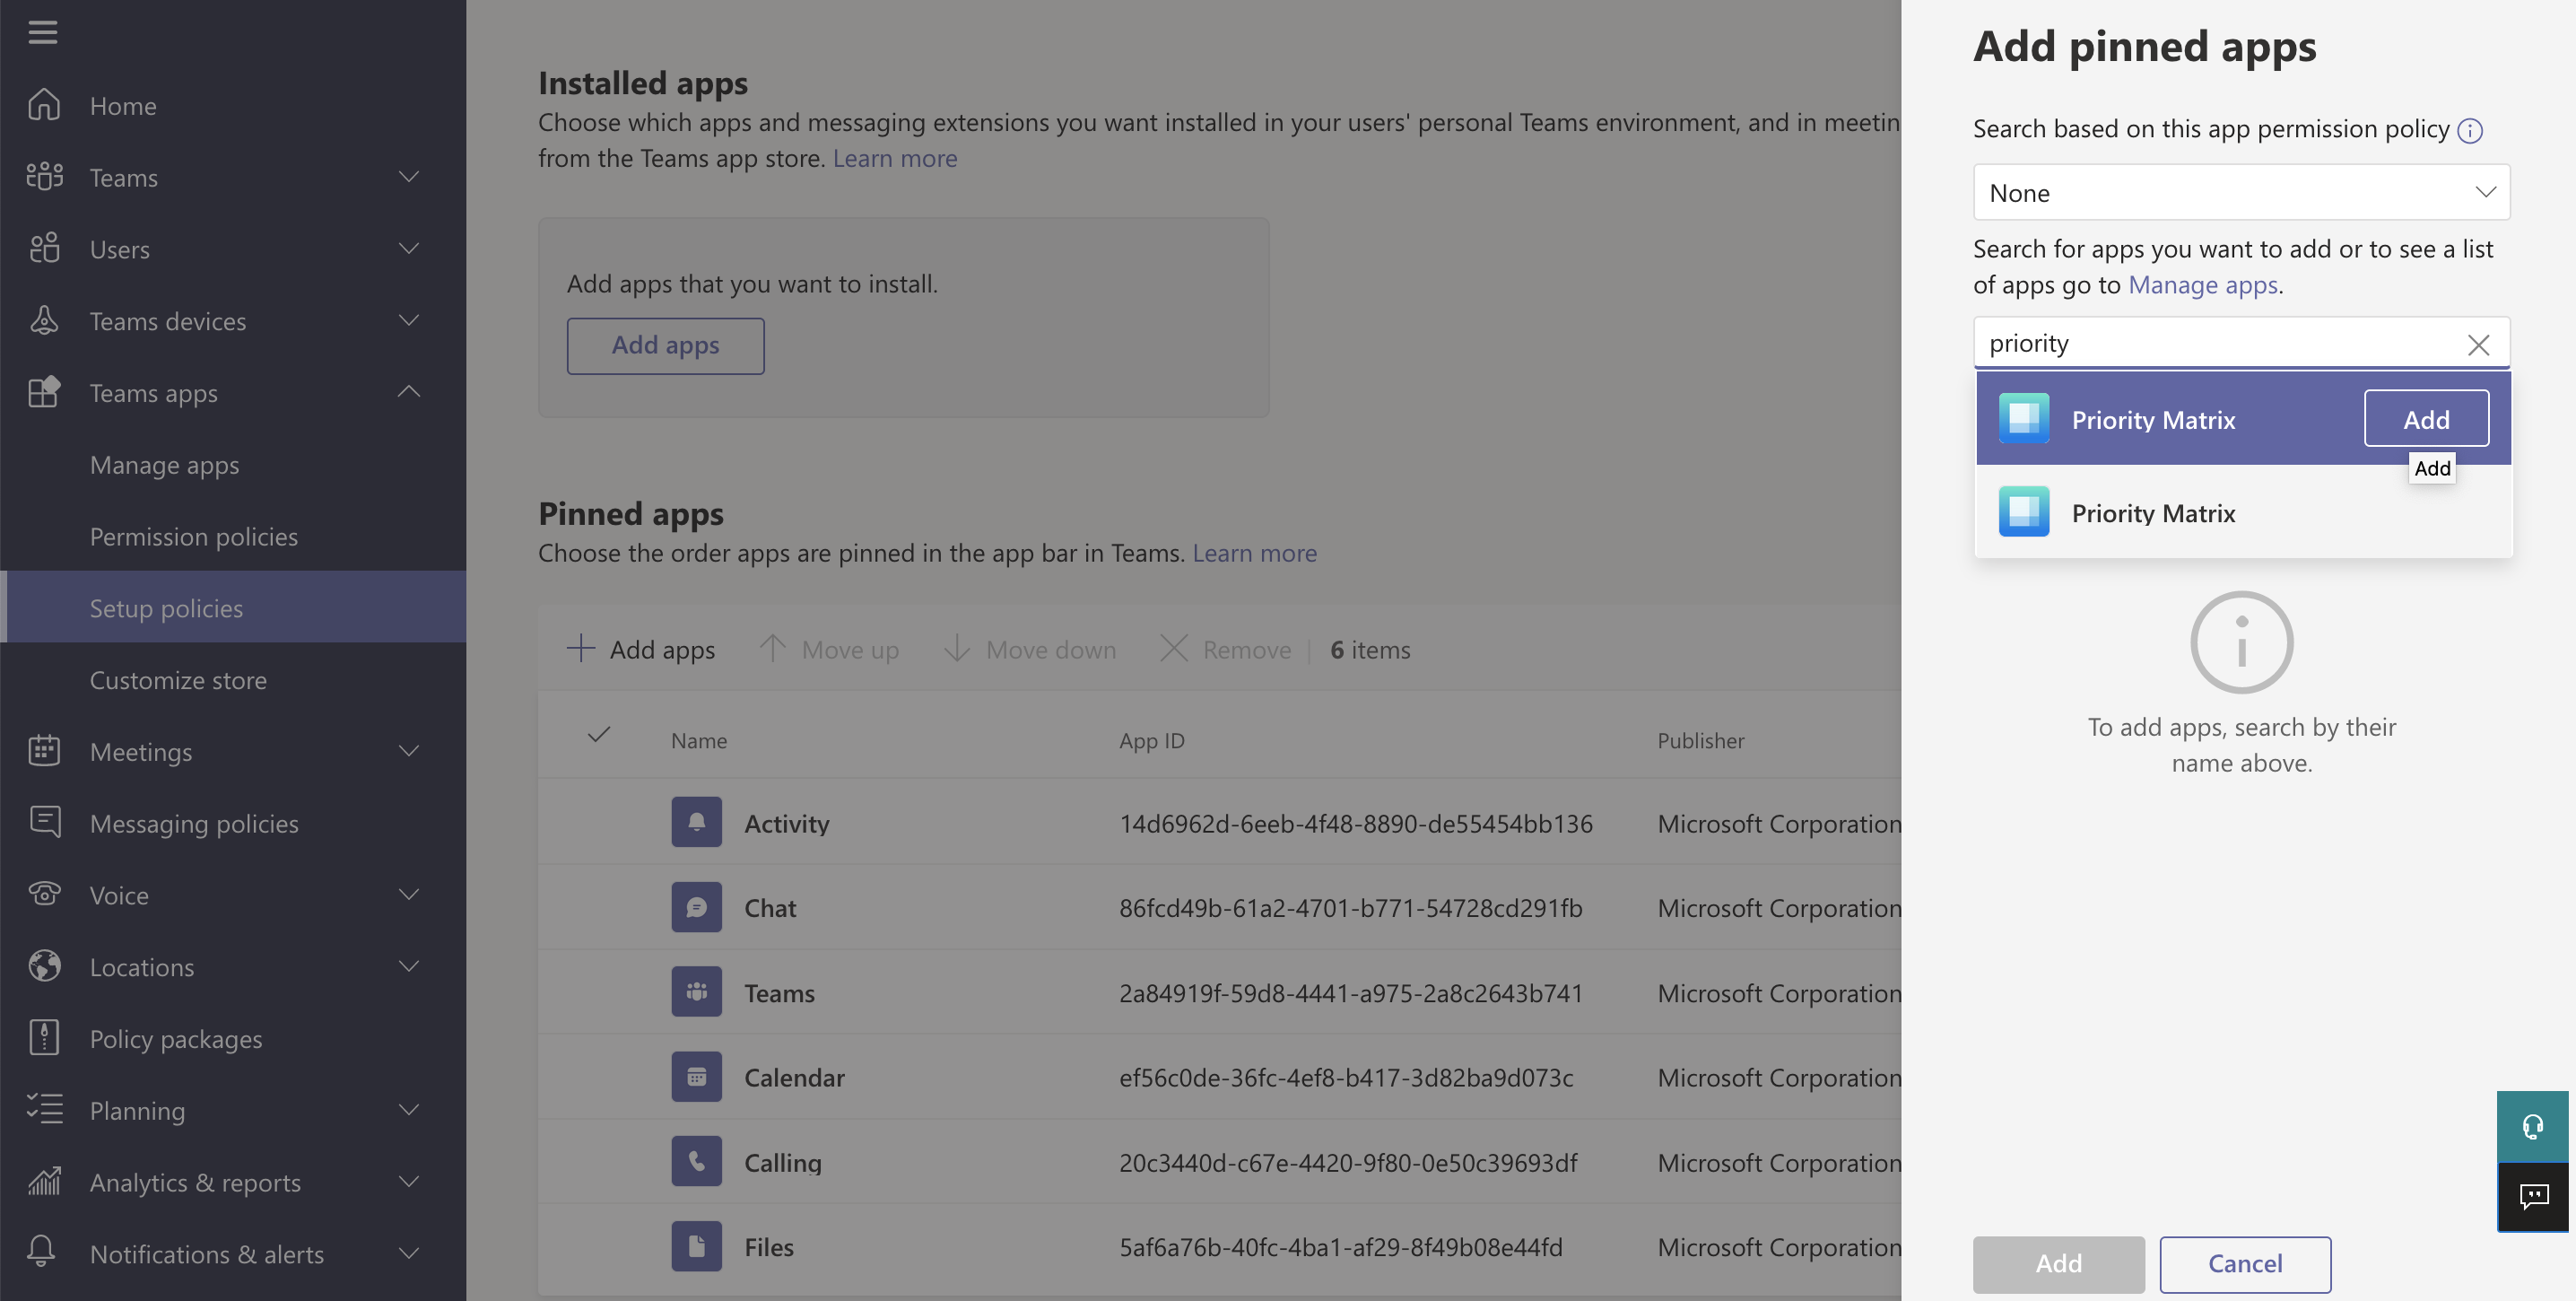
- Under "Pinned apps", click "Add apps" and search for "Priority Matrix" in the popup view, then click "add" next to the Priority Matrix logo.
- Bonus: If you haven't done so already, now is a good time to automatically install Priority Matrix for all your users, by clicking "Add apps" also under the "Installed Apps" header.
- Click "Save" so all your changes apply.
Once you are done with these steps, everyone in your organization will have easy access to Priority Matrix the next time they open Microsoft Teams. Your Admin Center screen should look similar to the capture shown below.
What if you are not an administrator?
Regular users can still pin Priority Matrix on their own Microsoft Teams sidebar. The only limitation is that this can only be done for themselves, not other users. If possible, we recommend that IT admins configure this for all users, to save everyone precious time.
If you read this far, perhaps you're also interested in learning how to install Priority Matrix for Outlook across your organization, saving everyone time and effort.