When you’re just getting started with Priority Matrix, there are a few things everyone should know.
Like, “What’s up with the Priority Matrix layout? How do I use it?”
Let’s break it down!
For the purpose of this walk-through, we can put ourselves in the shoes of Jake, the West Coast regional sales manager for a medical device company.
This is how you use Priority Matrix:

PROJECTS
On the left-hand side, you’ll notice a number of “projects”: California, Washington, Oregon, Idaho, Arizona.

You should create projects for your different areas of responsibility or initiatives.
For human resources managers, one example of a project might be implementing a new training plan. CEO’s may have projects for “Sales", "Marketing,” and “HR”. Consultants typically create one project for each client they work with.
To create a new project, click the “+” to the left of the word PROJECTS.
TASKS AND PRIORITIZATION
Within each project, there are four quadrants, ranked from highest to lowest priority (for more on this, click here).
To create a task, double-click in the blank space and type away!
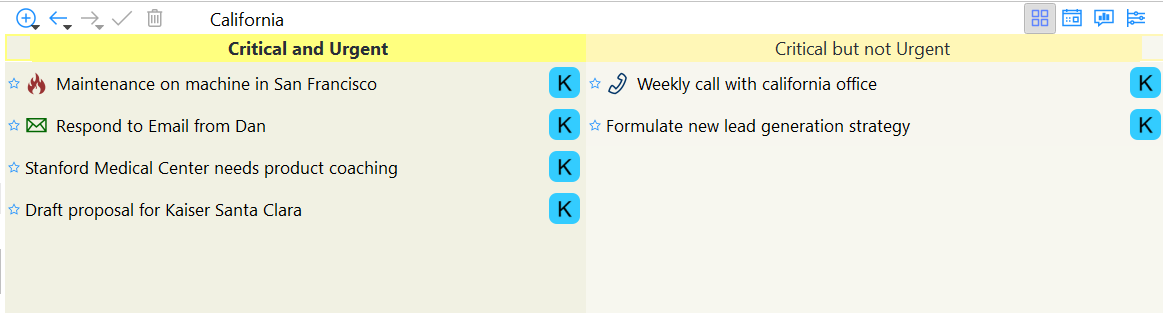
Tasks are considered “action items”. This might include drafting a contract, repairing a certain piece of equipment, or giving somebody a call.
Once you create a task, select it to enter “Item Details”. This is where you can add due dates, notes, or upload files.

If the priority level of a task changes, you can always drag and drop it to re-organize.
Click here to log into your account and start adding tasks!
Don't have an account? Download a Priority Matrix trial today!

If you’d like a more in-depth walk through, we have a full team of Customer Success representatives standing by to help you learn how to use Priority Matrix and evaluate whether or not the app fits the needs of your teams.