Get started with Priority Matrix for Windows
Priority Matrix is a software tool based on the 4-quadrant paradigm. Priority Matrix improves your life by solving 3 problems:
- Prioritization. So that you work on things that matter.
- Organization. Keeping your information synchronized and accessible anywhere and anytime.
- Ease of use. Providing you features and visual tools that let you work on projects and task easily, quickly, and frictionlessly.
Getting started videos for Windows:
Here’s the full transcript + images as presented by Lydia! Enjoy!
Welcome to Priority Matrix, the software that helps you plan simply and effectively for work and life. This tutorial is made to get you up and running in our windows app. This is the pm interface and this is the projects bar. Here, you can see a list of all your projects, and switch quickly between multiple projects.
Creating Projects
To add a new project, select the plus button to the top left.
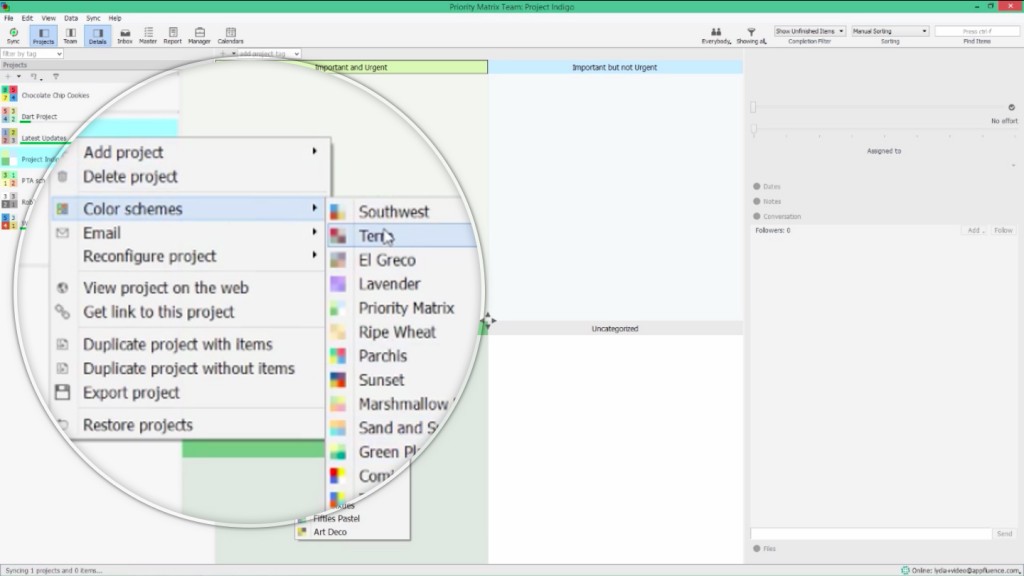
This adds a basic Eisenhower matrix, which allows you to organize your items by importance and urgency. To see the various templates available, click the drop down arrow and hover to see a short description of each template. Double click to rename your project. If you want to change quadrant colors, right click on the project and hover on color schemes and select any of the options available.
Using Tags to Manage Many Projects
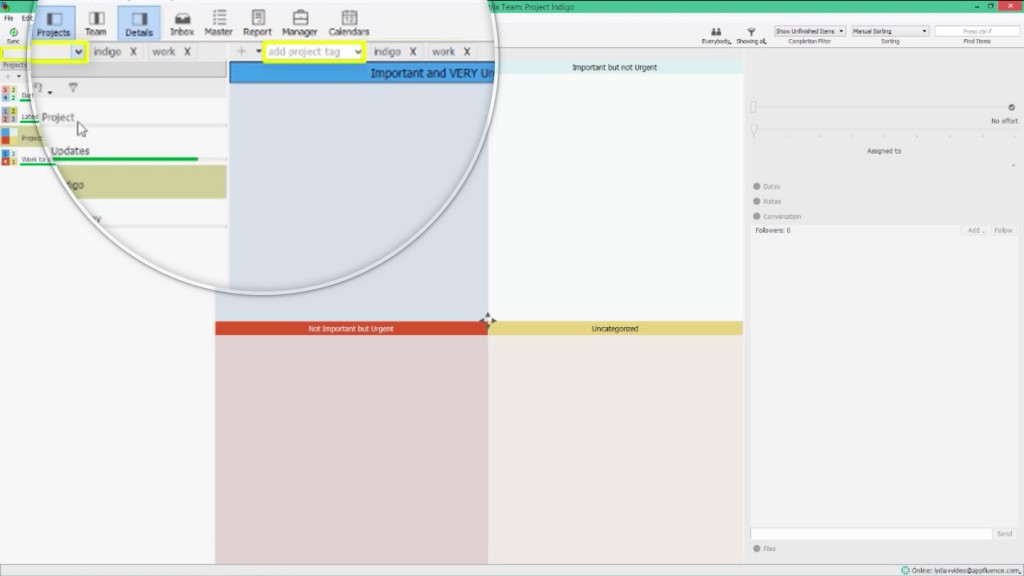
If you decide to customize your quadrant names, simply click in the quadrant title. To add tags to the project, click in the “add project tag” bar just about the quadrants and type to add custom keywords to distinguish this project. You can also click the dropdown button to add previously used tags.
Use as many or as few tags as needed. When you have many projects, you can use the tag filter in the projects bar to see only the projects you’ve associated with a certain tag. Filter by multiple tags to see all projects related to those tags.
Adding Items Quickly and Easily
When you first start adding items or tasks to your new projects, it can be overwhelming to add many items at once while deciding their importance and urgency. To simplify, you may want to add all your items to uncategorized and then drag and drop to the appropriate quadrants. To add an item, double click and begin typing.
When you add items, the details bar will show the selected item and allow you to add icons, completeness, effort— or the estimated time needed, assignees, dates, notes, conversations, and files.
Adding and Syncing Files
If there are files associated with this item, you can upload them by clicking the file tab and then the upload button.
If you want to add a single file you can simply drag and drop the file straight into priority matrix.
Creating Tasks and Upload Files Directly With Automatic Screenshots
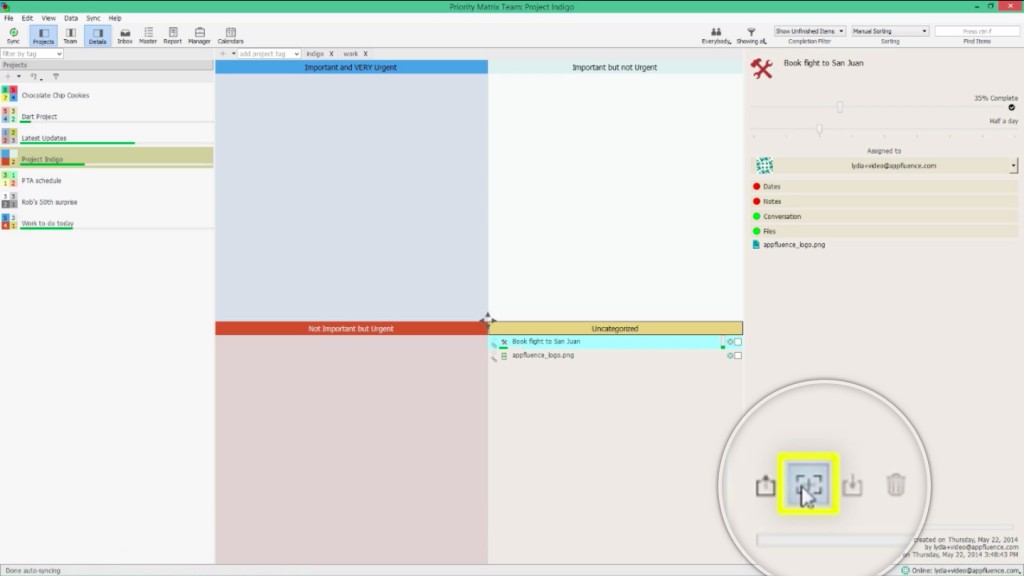
In addition to adding files, you can create and upload screenshots with just one button. This can be particularly helpful for teams working remotely who want fast feedback on visuals. To take a screenshot, click the screenshot button.

Drag over the area you want to show and Priority Matrix is already uploading it for you. Repeat the process for multiple screenshots on a single item.
Double click to open. Now, you can have your files everywhere you go with the added benefit of due dates, notes, and more associated with that file. You can even assign these files to other people to read or give feedback.
Managing Where to Focus Your Attention
To quickly add more items in the quadrant you’re currently in, type ctrl N or right click for “new item”. After you’ve added all your items, hold down with my mouse, and drag and drop each item into its appropriate quadrant. If you want to focus on one particular quadrant, you can hold down the arrows and drag to resize.
Using Item Inbox
Another way of adding items is through your inbox, which is designed to help you jot down notes when your email is more easily accessible. Click the inbox button on the top left to open inbox. Right click the blue email link to copy, or click on it to pull up outlook or your preferred email client automatically. Now, whatever you type in the title will become the task name, and the email body will become the task’s notes. Add the inbox address to your contacts for quick access. Once the email is sent, it takes just a few moments to populate in the inbox. Hit the update button, select the desired project and quadrant, and click import.
Each item that is sent using the inbox will have an envelope icon to show that it was an emailed item.
Collaborating, Delegating and Discuss with Your Team
To explore the team aspects of priority matrix, click the team button on the top left to invite teammates to certain projects and to see your project feed. To invite project teammates, which are collaborators on the project level, click the plus icon. If you have an account with multiple users, you can find them by hovering on “add to project from other collaborators.” If you want to add someone who isn’t shown here, simply type in their email address. If they are not a Priority Matrix user, they will still be able to interact with PM through their email client.
Below your project teammates area, is your project feed, which is a history of all the changes made within the project listed by time. In this project feed, you can also send messages or comments to teammates on a project level, allowing you to give immediate feedback within the app. For task level collaboration, you can add assignees in the details bar, making one person responsible for a specific task. Click the drop down button under “assign to” to see teammates or type in a new email address. Give task level feedback to assignees under conversations.
Conclusion
We hope you found this broad overview of Priority Matrix useful. To learn more about more specific functions, please visit our video tutorials. Thanks for taking the time to check out Priority Matrix.


