Priority Matrix is a powerful collaboration tool. It helps you and your team get clarity on what matters most, so you can focus on high-impact tasks. But what happens when you need to collaborate with someone who does not have access to Priority Matrix? In that case, we provide two ways to share data with others which may work for you as well. We call them public items and read-only projects.
Public Items in Priority Matrix
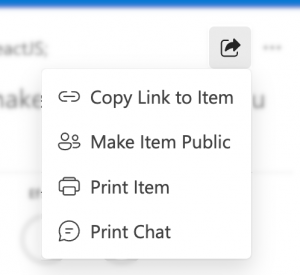
Sometimes you want to share an item with someone, but not necessarily an entire project. If they have Priority Matrix, you can make that person a follower of the item, and they will see that item in their inbox, without being able to see the containing project. However, if this person is not on Priority Matrix, that won’t work. Instead, you can make that item public, in one of two ways:
- You can type the command “make public” in the item chat
- Or you can open the item’s share menu and select “Make Item Public” as shown

When you do that, the item chat will show you a message like what you see below, indicating that the item is now public, as well as instructions to disable public access:

Sometimes we call this “guest mode”, because once you share the public item link with someone, they will be able to open and see it even if they’re not logged in. More interestingly, they can even add comments to that public item, which is useful, for example for public comment items, and to gather feedback from strangers, or large groups of people.
Even better, if you want to publish the item on your blog or website, even in an intranet, we make it easy. Following instructions in the item chat itself you can do something like what you see below:
You can explore, open this in an incognito window if you want, and see what happens.
Read-Only Projects in Priority Matrix
Sometimes you want to give people more visibility into what you’re doing, without necessarily allowing them to make changes. This is the reason why we created the concept of read-only project access, which you can enable to publish an entire project to the public, while at the same time retaining full control over its content.
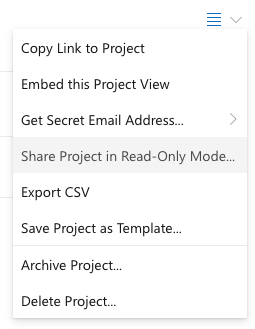
To enable read-only access, you need to open the project, select the main menu and click on “Share Project in Read-Only Mode…” which will guide you through the process of getting the shareable read-only link, as well as embedding it into your blog or website.

Once you have your read-only link, you can share it on your website or blog, and it will look similar to the following:
Again, feel free to open this in an incognito/private and click around to understand how read-only projects work.
When you share the read-only project with someone, they can open it and explore most elements, but they cannot:
- Make comments
- Create, edit or delete items
- Invite anyone else, other than by sharing the link
- View attachments and chat history of individual items
We hope that you found this useful and informative. If you have any questions or suggestions, please contact us and let us know. We read every message!